Wednesday, December 17, 2008

Tutorial for a super simple case to fit an iphone

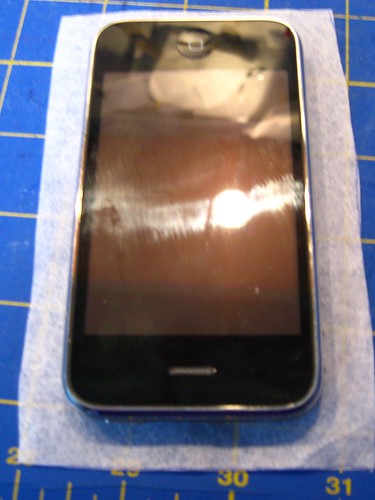
This is for an iphone but the instructions can be used to make a simple sleeve-style case for whatever you need. And I do mean simple. My goal was to have something to project it in my bag basically, while giving me the option of some minimal functionality with it in the sleeve.

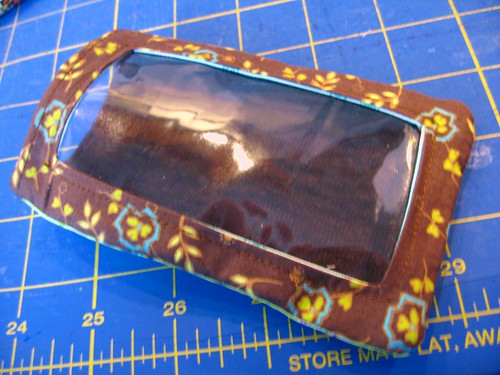
COMPLETED:


First, you need to get the size you need. I laid my phone on my pattern material and added a generous seam allowance. My rectangle is 4-1/2 x 5-1/2 inches.

IMG_3301

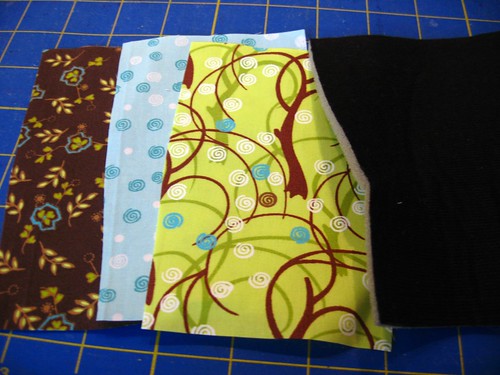
You need to cut 4 of those rectangles above: One back outside, one back inside, one front outside and one front inside. I cut 3 from cotton and 1 from a padded foam remnant. The padded foam is the back inside in mine. You will also need a piece of vinyl, described later.

IMG_3303

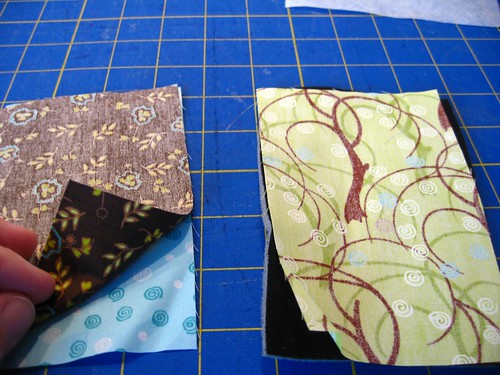
Stack them RIGHT sides together with front outer to front lining and back outer to back inner.

IMG_3304

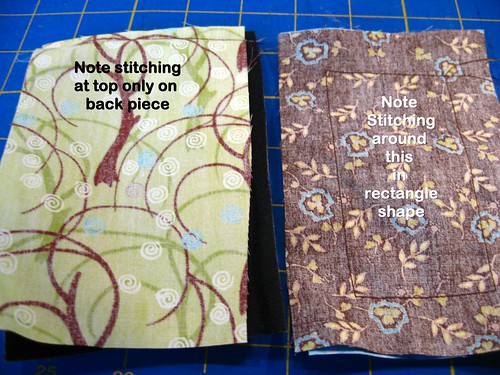
On the back, sew just what will be the TOP of the case, lining to outside back.

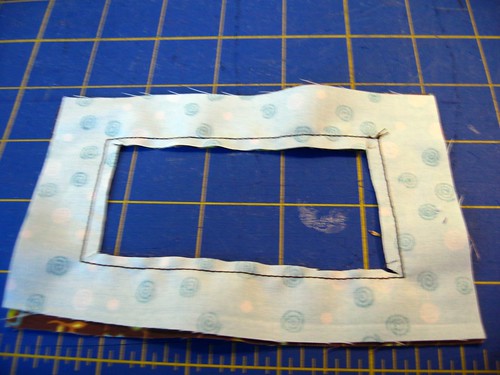
On the front pieces, sew what will be the front opening. I did a rectangle paralleling the fabric, slightly less than 1 inch inside the margins.

img_3306

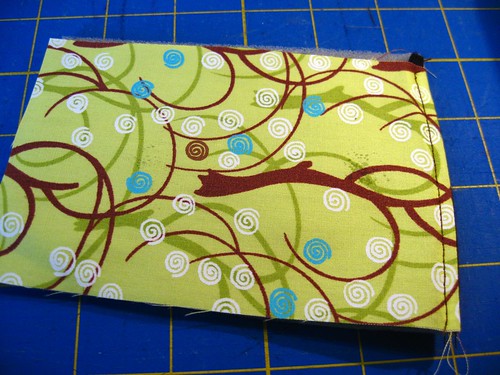
Flip the back piece so the right sides are out and topstitch your one seam. This creates a neat back top for the opening for the case.

IMG_3307

Cut out the window opening on the front pieces by cutting inside the inner rectangle you sewed. Cut close to the seam, and trim the corners very very close for turning.

IMG_3308

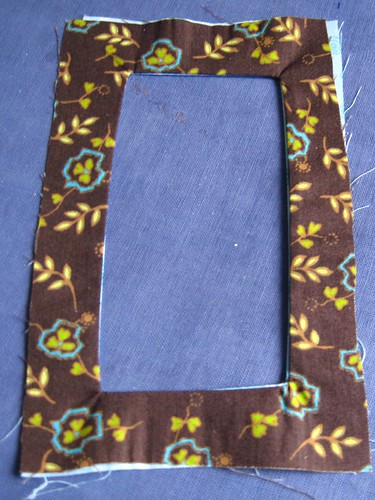
Turn the front piece right side out and press it.

IMG_3309

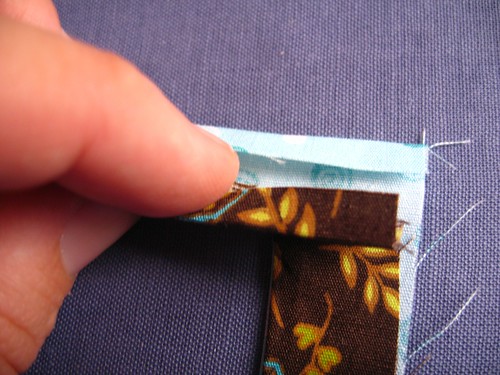
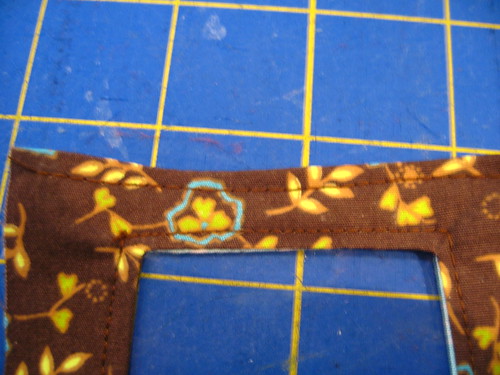
On what will become the top of the front, fold in your edges to prepare for topstitching that opening neatly.

IMG_3310

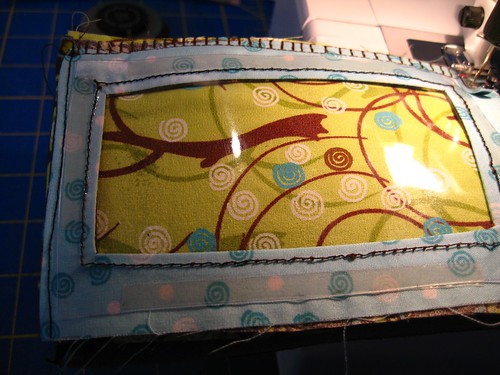
Now cut your vinyl window piece slightly larger than the opening in the front.

IMG_3311

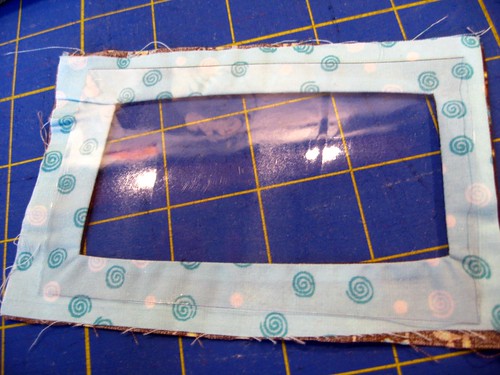
Stitch the vinyl to the back of the front piece, covering the window opening with the vinyl. Also topstitch what will be the top front of the case. This is just to make a neat edge at what will be the opening of the case in the front.

img_3314

Layer the top of the case on the back, right sides together, and sew them around the 3 unfinished sides (sides and bottom of the case), leaving open what will be the case opening at the top.

IMG_3316

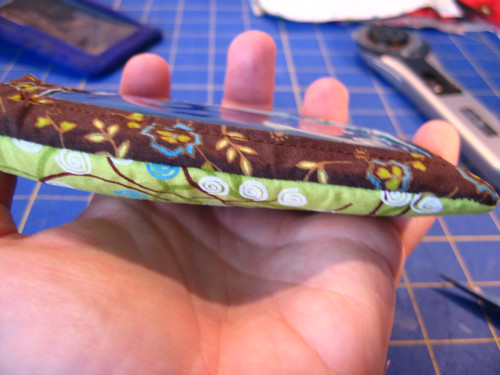
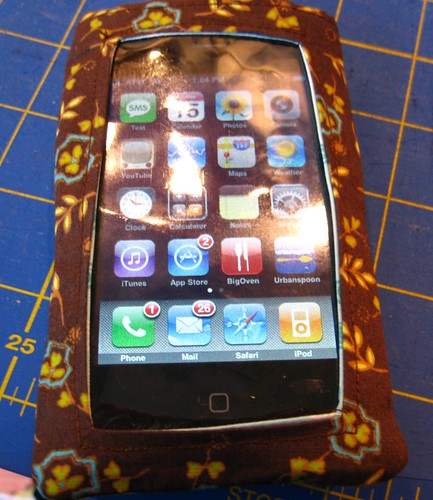
Turn it right side out and you are done. Note turning vinyl is probably not recommended, but do it carefully and try not to crease it sharply and it comes out okay for me.

IMG_3318

All done:

img_3320

Suggested modifications I may try in the future are an arm band (elastic attached to the back piece before stitching the body of the case together) for DH as he has requested, plus a snap at the top or closure, etc. You could make a ring to attach it to your bag or whatever too. You could create an opening for the camera eye in the back, opening for the speaker, etc. I just needed simple though as I carry mine in my bag and use a bluetooth headset for talking so this works for me.

Monday, December 08, 2008


Today, Zach and I had the pleasure of delving into a new book, If the World Were a Village: A Book about the World's People, written by David J. Smith.

Even adults have trouble grasping the enormity of the population of the entire world as a number and attempting to envision how many that really is, then applying abstract and dehumanized percentages of how many people live where and so forth to that original unimaginable number. I had come across the natural concept of reducing that population number to 100 and then using the percentages as people. So, if the number to imagine was 1%, then 1 person in that 100 would do whatever it was.

This book, I feel, does a particularly nice job of presenting this information to children. It is a larger format, with wonderful illustrations (done by Shelagh Armstrong). The 1st page of the book sets the stage, encouraging us to travel into our mind to the "global village" of 100 people. Then, each 2-page spread in the book covers another topic, including "nationalities," "languages" and so forth, leading up to "the village in the past" and the "village in the future," meaning in this case population growth and issues regarding that. They do, by the way, make a quick note that scientists do disagree with some of the population growth numbers they present.

Zach was really engaged in this book, with wide eyes at the some of the facts presented, though honestly it wasn't new information. It really seemed to speak to him in a language he could grasp though, especially the pages on "air and water" (focus on pollution) and "food" (again, focus on how many in our world go hungry each day).

We use a religious homeschool curriculum and these topics do come up often in the sense of social justice. Honestly what is nice about this book is that it is NOT presented from a Christian perspective, thereby giving it a wider appeal, and allowing of course use in the classroom. It is presented in a quite factual and matter of fact tone, while still engaging the reader into some reflection about the meaning.

For the parent or teacher, there is a nice 2-page spread of suggestions for teaching children about the global village, or world, beyond this book.

In browsing online, I did see this interesting information on the author's website, including further links and activities, including several geared directly towards teachers and parents.

Only note I would make to those of you interested, is that the author is very very concerned about population growth and population control, so if these are issues where you tend to disagree with many scientists, you might want to view the author's website and position before you order the book for your children. I found the information to be emphasized in the book, but I also found it to be presented in a factual rather than a preachy manner for what it's worth.

As I said, we quite enjoyed the book as an addition to expand our core 1 studies for Sonlight, which is titled "Intro to World History." We worked on the Usborne Book of Peoples of the World this morning in our curriculum reading, and this was a very nice adjunct to that.

The Doodle Pro helps in spelling.


I don't know why this one didn't occur to us before now honestly. Today we were going over spelling words, day 1, meaning that we were looking them over for the first time. The suggestions in our Sonlight IG include having the child write them at first on a blackboard or dry erase board, etc., as kids love the large movements. Plus, from my own experience, it would likely just add some fun to spelling as kids love white erase boards! In any case, we don't have one in our school area, aka, the family room. But this morning my eyes landed on a discarded Doodle Pro lying on the carpet. Aha! Zach LOVED writing out his words on his Doodle Pro. It is the little things in life that add up to a fun day for him, so I'm sharing this tiny tip to anyone who has a Doodle Pro or similar item and wants to give it a go on the spelling.

Friday, December 05, 2008

We are done with Core K!!

Just today we finally finished up Sonlight Core K, a couple months delayed from our ideal end date. We had some setbacks, a new baby and so forth. What a great time we had doing it though, and I highly recommend Sonlight for homeschooling. We skipped parts of some of the books, most notably in Hero Tales, but overall the books were loved and enjoyed thoroughly for the great literature they are, timeless classics.

Now on to core 1, woohoo! We are also doing the new P3/4 core for Noah, and that is fun in its own right, though we have already discarded the Bible Stories book it came with, as that was far advanced for the age group and not interesting at all to him. We replaced it with an easier Bible Stories book and are thoroughly enjoying the other selections. Noah is quite proud that he too has special school books!

Friday, November 07, 2008

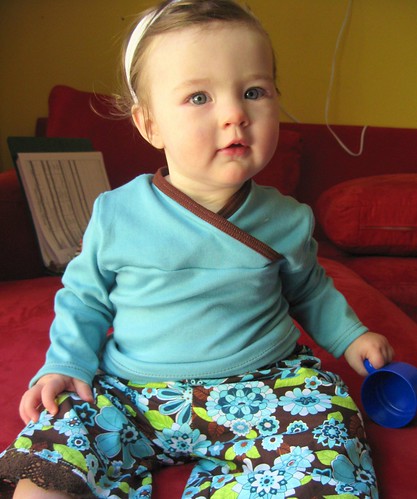
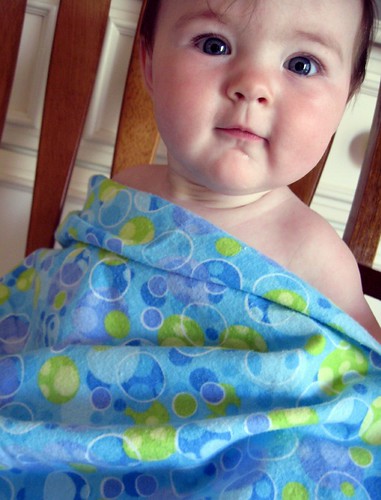
Happy birthday baby girl


IMG_3211, originally uploaded by WeeBeaks.

I can't believe she is a year old already. I had to document it with a picture this week. This past year has just flown by.

Thursday, October 23, 2008

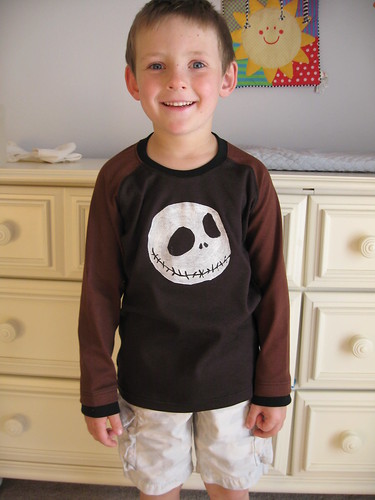
Zach's new shirt


Zach's new shirt, originally uploaded by WeeBeaks.

It's been a while so time for a photo! This is a shirt I made for Zach.

In other news ... there isn't too much. We just go day by day, homeschooling, dealing with life. :)

In sewing news, I'm sewing for family lately, and preparing for holiday sewing. I have several things in mind for each of the kids. I'm working on Zach's denim rag quilt. It would be done by now had I not sewed a bunch of the blocks together wrong! GGGRR. I hate when that happens. But it is fixable with the seam ripper at least. It has set me back in my timeline for completion of that. I'll post a picture of that when I get it done. It is not complicated by any means, and not elaborate. It is my hope that it will serve him for many years as it is rather plain honestly, befitting of a growing boy who is getting past the cutesy stage.

I also have cut out 5 new tops for myself and sewed up 4 of them already, all from Ottobre. These were sorely needed as some of my shirts, in fact probably more than 50% of them, are older than Zach. I just needed to get moving on the shirts as they certainly are not hard to do, taking an hour or less each now that I have the pattern adjusted my shape.

The kids are quiet, so if I sprint off right away from the computer I may get to sew a few seams before someone needs mommy again.

Tuesday, October 14, 2008

Walgreens deal on peanut butter

Just time for a quick post tonight of Walgreens. The best deal for us this week is on Skippy peanut butter. They are 3 jars for $5 this week, and if you buy $15 worth you get a coupon for $5 off your next Walgreens order. There are coupons out for $1 off 2 jars of Skippy. So,

Buy 9 jars of Skippy = $15
Use 4 of the $1 off 2 jars: -$4

You get 9 jars of Skippy for $11 and $5 off your next order, so essentially 9 jars of Skippy peanut butter for $6, or $0.67 per jar.

While you are there, check to see clearance items. Our brand new store has on clearance Mexican food items including Herdez salsa for $1. There are coupons for $0.50/1 jar so that means Herdez at $0.50 per jar. The expiration date on ours is 2010, so cheap salsa for us for a while. Happy shopping! :)

Wednesday, September 24, 2008

CVS Bargains today

I'm once again lagging on my blog, so I'll ease back into it with an easy topic - bargain hunting! I'm trying to stick to a strict budget (or "spending plan" as some like to call it), so bargain hunting, couponing, etc., is all part of daily life for us. ;)

This week CVS had Purex laundry detergent for $2.99 a bottle (38 loads for the one I got), with $1 ECB on each bottle, so $1.99 a bottle. You could buy up to 5 bottles (i.e., get $5 in ECB). I found a coupon for $1 off 2 bottles, so picked up 2 bottles: 2x$2.99 = $5.98 - $1 coupon = $4.98 and got $2 in ECB so total cost was essentially $2.98 for 2 bottles, or $1.49 each for 38 loads (about 4 cents per load). I paid using a $4.99 ECB received from an item last week, so total OOP (out of pocket) cost was the tax, or 8 cents. :)

Not quite a good as my homemade laundry detergent I have been making but I'm having some trouble finding Borax locally lately, so these will get us through until I can find Borax and get a good deal on it. Ralphs here has Borax but at the price on it, it is cheaper to find sales on regular detergent!

Then the boys and I walked across to the 99 cent store. Prior to this month I don't think I had gone in there but maybe once in the past 10 years. I saw a post on a message board that people were finding some reasonably good deals in there on food and necessities so I decided to give it a try. Those posters were right! It is hit or miss on what exactly they have that day, but there are some great deals! Here is what I purchased today:
1 package of 8 of the bigger size Sara Lee whole wheat buns ($3.50+ at Vons!)
2 packages of 4 bagels each, better than Vons still
1 box of Nilla Wafers ... okay, so the kids and I were a little hungry ...
2 Lunchables at $1 each for the boys' lunches
1 HUGE loaf of the Sara Lee sheepherders bread, very fresh and soft ($3+ at Vons!)
1 bottle of organic chocolate soymilk to go with the kids' Lunchables
4 cans of cola (79 cents for 4 cans)
1 bag of Back to Nature almond and honey granola

Total cost: $9.xx ... lunch for today for the kids and me (I had PB&J on the new bread with the cola and some of the granola) plus a couple things for the house for the week, good deal for around here!

Again, I was pretty impressed and will be checking in there prior to the grocery store (they are in the same shopping center so no extra gas required). They also had Yoplait yogurt for 49 cents each, personal size watermelons for 99 cents, honeydew melons for 99 cents each, big bags of frozen French fries for 99 cents, really a great assortment. Too bad they didn't have my Borax ...

Thursday, August 21, 2008

Joey

Joey and Michael

Joey is our younger dog, pictured in the photo on the left. He is 100+ pounds of complete mut, and he has been with the family nearly 10 years now. He started limping on Monday. I thought it must be something in his paw or that he had developed hip problems given that he is huge and getting old. It wasn't. He has been diagnosed with bone cancer, osteosarcoma. His prognosis is pain medication and 6-8 weeks to live. We are struggling with that this week. Our older dog, Michael, on the right is much older and we honestly think probably doesn't have more than a year or so. I never never thought Joey would go first. So now we wait, keep him comfortable, give him extra pats and love and say our good-byes.

Wednesday, August 06, 2008

I'm calmer now ...

After my ranting about Sonlight, I think we will stick with the curriculum but maybe not the forums as much. I sat down in preparation for the new year and looked over our books and ideas for next year, and it's going to be an exciting year! As usual, I have to keep our materials under lock and key as Zach usually wants to read through them all in the first two days. What could be a stronger indicator that the curriculum matches the child than when he wants to read it all immediately? So, we're continuing. I still don't have to like their forum policies though! Blech. I'll definitely be looking around at other homeschooling forums to talk curriculum and day to day stuff!

We got a little behind on the official schedule with a newborn in the house last year so we are still finishing up a bit of last year's core. We have core 1 here ready to go though, with a few books still yet to arrive through Dehesa (the charter school we are using this year). After the CHN Expo and the new books, I'm as excited as he is to get going.

Speaking of the California Homeschool Network Expo this year, I'll need to write more on that later because there was a LOT of good things this year as always.

My mind is a little scattered this week though as I prepare to go to a craft fair this weekend as a vendor. Woohoo but nervous and not ready. August is a busy month for us this year.

Monday, August 04, 2008

Sonlight new stupidity

Those of you who read my blog probably know we use Sonlight for our curriculum. To be honest, I'm really really rethinking that and it has very little to do with the actual curriculum. My hesitation began when when they changed their forums a couple years ago from being open to having to pay for them unless you bought X dollars in merchandise each year basically. I think they shot themselves directly in the foot on that one. I personally visited their forums because they were a vibrant community, full of advice and chatter regarding homeschooling. Um, let's just say they are not as active now, but still some decent threads so I visit periodically.

Oh, and let's not forget that even if you spend $150 or whatever it is for your curriculum and board access you have to pay if you want to sell used curriculum on their, a monthly fee. Nope, sorry. I'll sell anything I have locally or other (multiple) free sites.

Now you may say it costs them server usage, bandwidth and of course the used curriculum takes away from people buying new, right? That is true, there is a cost to them. However, I would have never started on Sonlight at all if I hadn't chatted with ladies on the forum (back when it was free), who encouraged me with their wonderful advice on how wonderful Sonlight was working for their families. Sonlight has lost a lot of word of mouth advertising by closing the forum to general population, and word of mouth advertising is hard to beat.

Then today I go to log in and change my board signature to update the ages of my kids and learn that nobody can put links in their signature that are clickable. Hell, let's just all go back to the dark ages and forget the internet!! On searching the boards I can see it is a new change but not why. I presume so people can't advertise or what?! I have my blog link in my sig, and I LOVED visiting other blogs of moms from the boards. If I read an interesting post, well thought out or just interesting, I would often check their sig to see if they had a blog in there and browse it. I seriously doubt I will be copying and pasting titles (you can still put text in your sig just not links) and hunting for blogs.

So, Sonlight, you just gave me a very very good reason to visit your forum even less now. I guess I should look on the bright side - I'll save lots of money because I won't be tempted by people raving about new IGs, new LAs, new products you offer and so forth!

As an aside, I also gave up on the Mothering.com forums too for a similar reason - so heavily policed and restricted in signatures and content. I just don't do well with Big Brother sites and prefer to spend my time on sites where free flow of ideas AND LINKS flourish. No renewing my subscription to their magazine either.

The attitude and business sense of companies means a whole lot to me. I buy handmade, support small business and look carefully at my choices. The restrictive "big brother" feeling sites really are a turnoff to me, and I will not use my money to support an attitude like that.

Tuesday, July 15, 2008

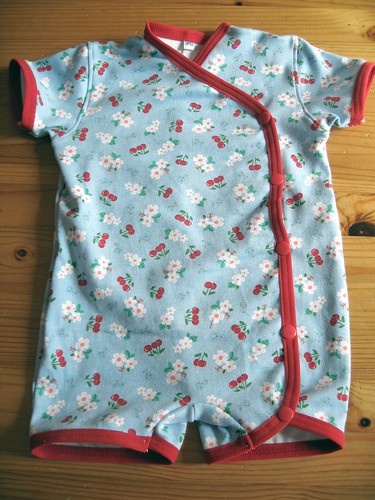
Ottobre romper


Ottobre romper, originally uploaded by WeeBeaks.

I'm always at least one issue of Ottobre magazine behind. Just this week the new issue (fall things) arrived, and I sewed this up from the 3/08 edition. I did a 68 cm. The fit is good in width but just fits in length now with her cloth diapers so she will grow out of it quickly. That's okay though; we will enjoy it while it fits. No modeled shot this time as she is a little grumpy this morning and not into wearing it other than a quick fitting for snap placement prior to me completing the snaps.

Saturday, July 12, 2008

My shop is participating in a contest

My Etsy Shop donated a small item for a prize basket for a contest this month on MakeBabyStuff.com If you are pregnant or have a baby or small child, please head over there and enter this wonderful contest. There were lots of sponsors so the prize baskets are fantastic indeed. While you are there, browse around and enjoy the site! There are lots of crafts and fun things to make, an all around great site. They do have a newsletter in addition to their tutorials and fun stuff. Enjoy!

Wednesday, July 02, 2008

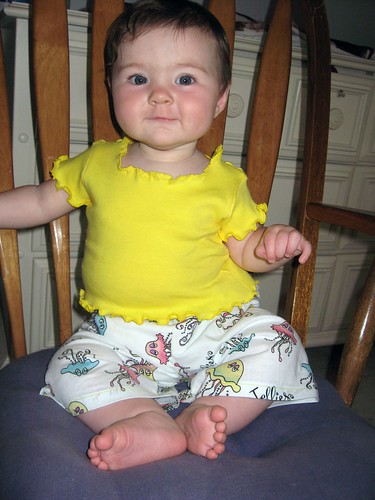
New Outfit for Lily


New Outfit for Lily, originally uploaded by WeeBeaks.

I have been sewing a lot for my Etsy shop and not so much for the kids and husband so this week have been doing some more for them. This set is from Ottobre 2/2004 magazine, a simple little top and pants.

We have loads and loads of clothing for her, but honestly it is mostly pink. She looks great in more vivid colors. I feel bad sewing though when we have so much already for her given to us. It is pretty disappointing honestly. I looked forward to a baby girl for so many years and don't really get to sew for her. This is my compromise of sewing a tiny bit for her and using what was given to us. I'm too frugal to just donate what was given, but she may be my last baby and I will always regret not making things for her if I don't. So here she is in her mama made outfit today, my own little miss sunshine there.

Lily modeling a receiving blanket

I made the receiving blanket for my shop, which I like, but I LOVE how the photo of Lily came out so I'm showing off Lily. Sorry folks, she isn't for sale at any price!

Tuesday, June 24, 2008

My FP treasury

My FP treasury
On Etsy, the front page is a "treasury," meaning a collection of items essentially, that individual buyers or sellers can choose and put together. There are hundreds of treasuries at any one time, and the Etsy staff picks one every 1/2 hour or hour to be the front page. Today a treasury I created (or curated as Etsy calls it) was chosen and was up for a 1/2 hour or so. Woohoo!!!

Monday, June 23, 2008

Pirate Zach is 6!!


Pirate Zach is 6!!, originally uploaded by WeeBeaks.

I haven't had many family photos up lately so we are long overdue for one. Here is a photo from Zach's birthday party. He wanted a pirate theme and got it, including grandma and papa dressing up as well. He was so happy. Here he is taking a short rest and browsing in one of his new books he received from Amy. He LOVES books so this particular gift was a huge hit.


P.S. The T-shirt is from an Etsy shop. It came out really cute. As I know Etsy sellers can use all the publicity they can get, here is the link to Stephanie's Boutique where I purchased it. :)

Tuesday, June 17, 2008

Byron in his new shirt


Byron in his new shirt, originally uploaded by WeeBeaks.

Many thanks for the photo of Byron wearing a shirt I made for him through my shop. I loved making it, and hope he loves wearing it.

By the way, for more information about this family, their travels (WOW!) and their Etsy shop, please visit their blog Unkamen Gifts

Have fun on your travels!

Tuesday, June 10, 2008

Tutorial on creating a stenciled image on fabric

If your kids are like mine, they LOVE designs on their clothing. No plain T-shirts for these boys! The plethora of fabulous fabric co-ops on yahoo gets me pretty far in terms of cute knit prints, but sometimes there are images and motifs I want to do that I can't even find there. Embroidery you say? True, but to be honest embroidery is not a huge love of mine. I do some embroidery, and generally enjoy it, but that isn't a huge passion of mine. It also leaves some things a bit stiff, especially if it is a large design. Lately, I have been dabbling in some fabric painting with stencils and wanted to show you that as a tutorial today.

My disclaimer is there are many, many other ways to do this. I've tried a few of them, and my personal opinion is this is the easiest I have found so far. So, I'm going to share how I do it with photos. If you have tips, comment and share! :)

First off, you need to have something to put a design on. Duh, right? So get a shirt, or do I like do and sew one. Or pants, pillowcase, whatever you want to put a design on. Make sure though it has been washed to remove the sizing from the fabric, and do not use fabric softener. You want the paint to stick to it well. Different fiber contents will have different results but most knits I have tried have had decent success.

You need some paint. You want stuff that can be used on fabric, and not wash out. Look for ones that specifically say fabric, and ideally not "puffy" types of paints ala the 1980s for this type of use. Try your local craft store. I am in this example using an acrylic, which works rather well. I found my particular brand and color for this project in the clearance bins at JoAnns for 75 cents.

Next you need a design. My design today comes from Ottobre Design which is a European pattern magazine. They have print for free designs on their site as well for personal use. If you want this exact one, go to the site, choose English and then "print for free" on the right side. You can scroll through, find it and print it. While you are there, check out their magazine, which has truly incredible sewing patterns, and often has a few stencil designs in every issue as well. I can't rave enough about their patterns though for kids. Okay, back to the topic, you have some design.
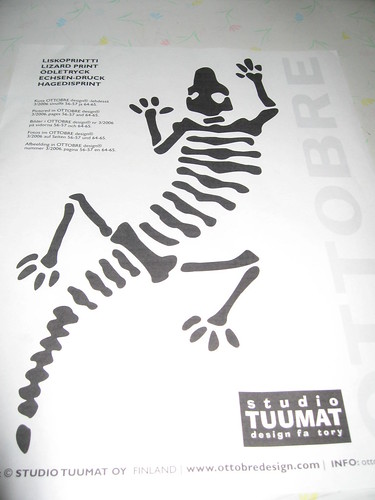
Original image

You need to trace this onto the material you are going to use as a stencil. I like freezer paper. This paper has a waxy type coating on one side and paper on the other. Other people use plastic sheeting or a variety of other things. My instructions from this point forward, and my photos, show the use of freezer paper.

I neglected to get a photo of the tracing step, but lay the paper, waxy side down, on top of your design. Trace it onto the paper side.

Now you need to cut out the areas of the design that are going to get paint. Think carefully on this and visualize it in your mind. You want to remove the paper from the areas that are going to be filled in with paint on the shirt. You might even want to color those in on the design to picture it better, and then cut out the colored parts to be sure you have it right. Use a very sharp Exacto type of knife. I got mine from the scrapbooking supplies area. They have some with swivel blades and all different types. You want it very sharp and small to do detailed cutting. Use only on a rubber mat or protective surface so you don't damage the surface underneath. Cut out carefully the areas to be painted. Here is mine partially cut out:
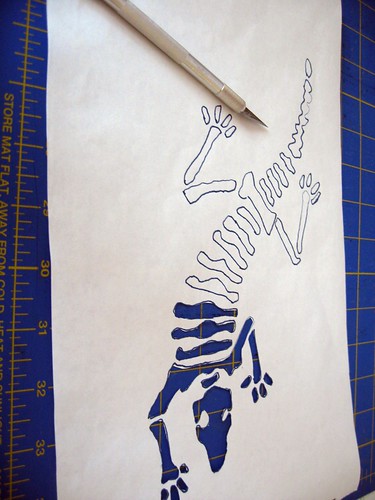
Cutting out stencil

Then completely cut out. Note I didn't remove the excess paper around the design. This is important. Only cut out the parts that get paint.
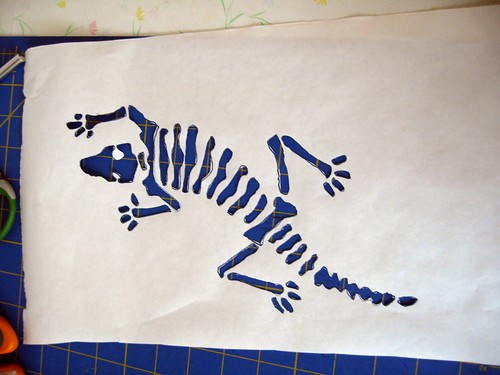
Stencil all ready

Position your stencil template on your fabric exactly where you want it, with the waxy side towards the fabric. This is very important -- make sure the waxy side is against the fabric! Take it to your ironing board. With an iron set to a warm setting, carefully iron over the freezer paper. This will soften the wax part and make it stick to your shirt. You want to be sure the paper is completely stuck to the shirt in all areas.
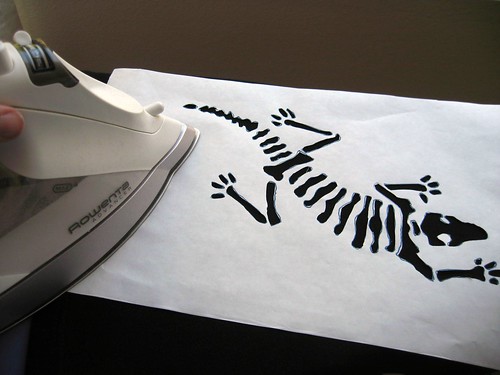
Ironing stencil on fabric

Take the shirt with stencil affixed to it to where you are painting. Put a protective layer inside the shirt so if paint bleeds through the front layer it doesn't stain the rest of the shirt. I used an old brown paper bag. Get your paint and start dabbing it on with a paintbrush or sponge into the areas cut out in the template.
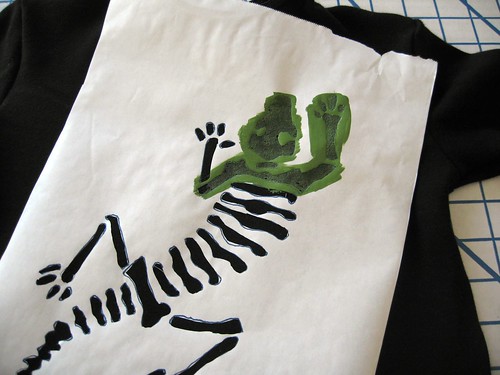
Starting to paint the stencil

Cover the whole area. It is likely you may need several coats as the paint soaks in a bit. The coats needed will depend on the fabric type, thickness and colors. I wait a few minutes and then recoat as it soaks in.

Here is my design all painted with several coats. Wait for it to dry a while like this.
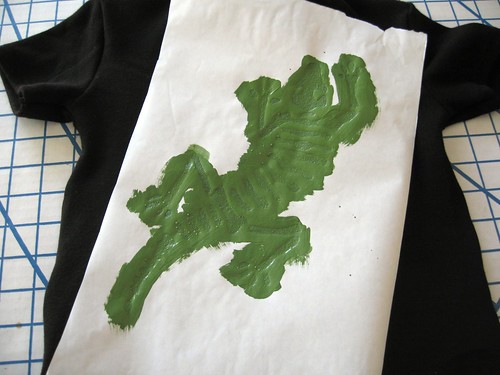
After a few coats

You don't have to wait for it to completely dry, and I find it is better to remove the freezer paper when it is still a little damp. It works kind of like removing that blue tape when you are painting rooms. If you wait too long the edges of the tape stick to the painted surface too much. Carefully pull the template loose. Remember you stuck it there with the iron/wax, so it will be a bit stuck. Just carefully lift it loose, being careful not to smear the design. Then admire your new design!
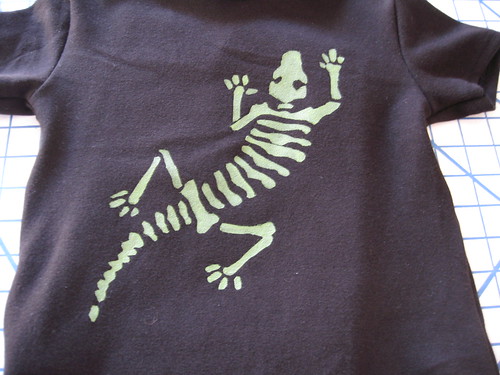
Completed shirt

Let the shirt dry completely (usually 24 hours or so) before wearing. Check your fabric paint bottle for specific instructions on your brand of paint. Have fun experimenting!
Thursday, June 05, 2008

Have you been introduced to Shady Side Farm?


Have you met Lona at Shady Side Farm? No? You are in for a treat! I'm going to let her tell you a little bit about herself and family, in her own words ...

Shady Side Farm is a small family-owned and operated farm in Western Michigan. Among other things, we raise sheep. Because of the abundance of wool (each sheep produces 5-10# of wool at each annual shearing), we're always looking for new things to make with the wool.

We produce roving for spinners and other crafters. Some of our wool is made into yarn at a mill right here in Michigan. This yarn is great for hand dyeing, knitting and crocheting. Recently, we started making greeting cards featuring sheep made from our wool.

Our whole family gets into the swing of things, from animal care to planning events at the farm, to creating items to sell. Mike is the spinner (he uses an Ashford Traveller wheel from New Zealand) and knits socks on an antique circular sock knitting machine. Lona has been weaving for 15 years or so, and produces primarily rag rugs made from recycled fabric. Ruth (17) is also a spinner, producing chunky novelty yarns on the Ashford Country wheel. She also designs and creates jewelry (see http://farmgirldesigns.etsy.com to see her work) and helps with the planning of events. Sara (14) is the visual artist of the family, preferring to work with pencils. She is also the animal lover, and is Mike's right hand man when it comes to sheep care. John (13) is our fix-it man, and only helps with creative pursuits if we make him. Our oldest daughter, Anne (19) is away at college and summer camp for most of the year, but also helps out when she's home.

Our etsy shop can be found at Shady Side Farm Details about our life on the farm are at our blog.

Thursday, May 29, 2008

Our Patchy Dress Sold

Well, our patchy dress sold. I'm almost sad, but Lily just doesn't need clothing. If/when we get to the point that she doesn't have a whole closet full of things given to her, I will sew for her. In the meantime, I'm happy that it is going to a little girl who maybe doesn't have so many dresses! :) I sure did enjoy making it, and that is really what is important. Some days now I do get a tiny bit tired of sewing, but then I back off a bit and the enthusiasm comes back. Also a trip to the fabric store usually brings back the enthusiasm as I look at all the gorgeous fabrics, touch the textures and dream what I could make with this fabric or that one. A trip to the fabric store is like going to the spa for me usually, unless the kids are with me that is, in which case it is get in there and get out as fast a possible! LOL

Monday, May 26, 2008

WeeBeaks has been featured

We are thrilled to be featured today on the blog of Lola and Ruby

Many thanks to them for featuring our patchy dress, and please take a look at the rest of their blog too. They have an assortment of fine handmade and vintage goods featured throughout their blog.

Sunday, May 25, 2008

The wonders of IKEA aka my storage solution

The wonders of IKEA
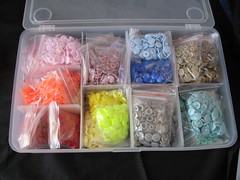
So honestly I am trying very hard to have less plastic in my environment, such as less plastic toy items for the kids, less plastic wrap, plastic bags, plastic baggies, plastic dishes, on and on. However, I have to admit that this new plastic gizmo from IKEA is PERFECT for my new set of 1000 plastic snaps. So there we go again with plastic, true, but I would rather have a plastic snap on a bib than velcro that sticks all over to everything. So I have here 1000 various color plastic snaps. And now I have the absolutely perfect size container to store said plastic snaps. Woot!

Tuesday, May 20, 2008

The pocket bib!


The pocket bib!, originally uploaded by WeeBeaks.

So I was poking around my recycled fabric bin today and cutting out jean squares for the quilt I'm working on when I pause to look at the pockets left over. They don't make good quilt squares, and I hate to throw them out, when I decided to try this. I trimmed out the pocket, left a little at the top, attached a ribbon and snaps and voila -- baby bib.

After posting a picture and asking some people what they thought, I have decided to offer it for sale in my Etsy shop, with a matching little size wipe/napkin to coordinate. It is the dinner to go pocket bib.

I have been feeling a little burned out lately, but this was fun to make and I have plenty more pockets should I want to make more!

Pirate skull and crossbones T-shirt

This is Zach's new shirt I made for him. In light of my recent post on Etsy custom made, I decided to list a custom listing for this shirt, meaning that the buyer chooses the size and I make it custom for the child. That is a little bit harder for me as it disrupts my flow of work honestly, but we will see if that would be a hit. Kids are a lot easier to fit than adults, especially women, but certainly there are fitting challenges for children too so I'm offering custom work with photos of one already completed.

The fabric by the way is a reversible knit. The sleeves with the black and white print are the backside of the skull/crossbones. What a fun fabric to work with. I see Sewzanne has this fabric by the way if anyone is interested. I'll give her a plug as she has fantastic customer service: http://www.sewzannesfabrics.com/Sewzanne's Fabrics

Tuesday, May 13, 2008

A tardy "thank you" and show

Last month I entered a drawing on a blog for a gorgeous handmade purse as a prize from Armstrong Industries.

Prize in a blog giveaway

It arrived not only with the purse but filled with goodies! You see it below. I have received so many compliments since I started using this bag. Now, how can you too get one of these bags? Well, maybe not one identical, but she has some gorgeous things in her Etsy shop, so take a look:
Armstrong Industries

I can personally vouch for the fact that they are well made, and gorgeous! Happy shopping.

Thursday, May 08, 2008

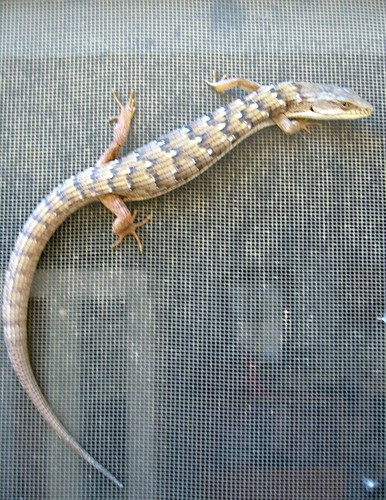
Lizard on my window


Lizard on my window, originally uploaded by WeeBeaks.

This weekend I was working in the and looked up to see this fellow on my window screen, the outside of the screen thank goodness. Rich and Zach ran to get the camera and go outside and have a look at him (or her I guess). They were able to get a good look at him and get this photograph. Very pretty huh?

No need to go to the zoo for homeschooling. There is enough right at your own window. haha.

Wednesday, May 07, 2008

Handmade? Why not go custom made?

I'm going to ruminate a bit about an interesting forum thread yesterday at Etsy. It was not unique as I have seen a couple other similar posts. The originator of the post was a plus sized lady who was lamenting that more shops don't offer plus sizing in their clothing. While that is a very valid concern, it is my strong belief that she should order custom, and in fact we all should! Buying handmade is fantastic in the general sense, but you are not really utilizing that to its fullest potential if you are buying standard sized clothing from a seamstress on Etsy. You have at your fingertips talented clothing designers and seamstresses that can customize the fit to your unique body! That is the real value of handmade clothing, and I don't see it proclaimed to the world when it should be. Yes, you can get regular standard sizing clothing on Etsy too, and it certainly has its place if you need it immediately obviously. But, aside from the handmade aspect (true, a big plus), you are getting the shape and size you can get in the mall anyway, which for most of us has it's problems. Consider it. You can get something sized to your measurements, guaranteed to fit pretty much. Next time you are buying clothing on Etsy, try out public alchemy, private alchemy from a seller whose clothing you admire or convo a few people and ask if they would do a custom listing and see what a wonderful fit you really can get with something sewn just for you.

Monday, May 05, 2008

Patchy fabric reversible baby dress

Okay, so this is the new item in my shop and probably will become part of Lily's wardrobe in some form or another. I did some deconstructing and altering to create this pattern, and this dress is the first one. It is a completely reversible little dress and can be worn alone in the summer and with a turtleneck and leggings in the winter. As I look at Lily's closet and see things that don't match, etc., etc., the more reversible and versatile garments appeal to me. This particular one is in size 9-12 months and is up for grabs in my Etsy shop, with more sizes and colors to choose from in the months ahead, and also some other new stuff still in my head. :)

Saturday, April 26, 2008

Winner winner

My bloggy carnival is over and a winner has been drawn, The Angel Forever

If our winner should fail to answer my email another will be drawn.

A big thank you to everyone who entered!

Monday, April 21, 2008

Bloggy Carnival Giveaway time

It's Bloggy Carnival time!

Bloggy Giveaways Quarterly Carnival Button


I participated last quarter as just a reader, but this time I'm sponsoring too! My prize is a set of my napkins. This set of four nice brown with blue batik. My specialty is kids napkins, but of course many of you may not have children so I'm offering a more generic set.

To enter, go to my shop WeeBeaks and look around. Then leave a comment here on this post telling me your favorite item and why. If you don't like anything tell me what you would LIKE to see and why. That is your entry. The winner will be drawn Friday evening at approximately 9 p.m. pacific. Good luck.

A few rules:
One entry per person please. I reserve the right to delete entries as needed (duplicates, etc).

The prize:
Batik cloth napkins set of 4

Tuesday, April 15, 2008

Lily in her new dress


Lily in her new dress, originally uploaded by WeeBeaks.

This photo was mainly taken to show her new dress, for which I was a pattern tester. I really liked how the photo came out though so thought I would post it on the blog. She is getting so big!

Butterflies are bye bye

We lost our last butterfly last Friday. Their lives are brief unfortunately. As I had mentioned, Zach did not want to release them but rather care for them in their enclosure. As we were down to the last two we convinced him Thursday night to release them. We took them out to the garden and gently put them on one of our roses. We got to see them drink and stay there for a while, observing, before they left. The next morning Zach found one on the ground by the rose. I looked out and he was sitting quietly holding it and touching it's wings. We found a cardboard box for burial, and he put some of his "treasuries" in with it, i.e., giving it a proper Egyptian burial as he has been reading about the Egyptian kings recently. He gave up some of his stick on jewels for the jewels for the afterlife for this little butterfly.

I'm so glad we decided to do the butterflies part of science this year. I think Zach really got a lot out of it, and it will be a very nice memory for him for a long time to come. In a year or two we will probably do it again, and maybe more as each child reaches that level in our curriculum to study the lifecycle of butterflies. It really does solidify the book learning to raise them and watch them.

Thursday, April 10, 2008

I made the front page!!!
No, not the newspaper. That probably wouldn't be a good thing as natural disasters and car accidents and stuff end up on the front page. Not a good thing at all.

I got to be on the front page of Etsy! Or rather one of my bibs did. :)

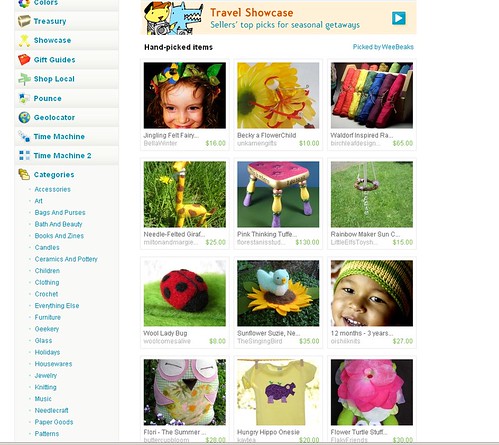
For those of you not as familiar with Etsy, there are things called treasuries, which are basically just collections of items for sale (not your items, other people's work that you admire) that look nice together or have a theme or are just favorites of yours. You can put your treasury in the collection of everyone else's grouping in the big thing called a Treasury. Then people can look at your collection your made of pretty items other people have made. In any case, I got to be in one person's treasury he made.

The front page of Etsy, i.e., the thing you seen when you type in www.etsy.com on your browser, features a rotating treasury. The treasury my bib was in got to be on the front page today! I was so excited. Here is a screen shot for posterity. LOL

My little bib unfortunately did not sell during its time of exposure on the front page. However, over 1000 people clicked on it and looked at it!

Front page!

Tuesday, April 08, 2008

Our butterflies are butterflies

I hope to get a good picture later in the day, but I had to update that our butterflies came out of their shells last week. We now have 5 beautiful Painted Ladies to watch, feed and enjoy. Zach does not want to release them into the yard, so we will care for them for their brief lifespan (couple weeks usually). He enjoys looking at them.

Monday, April 07, 2008

New item in my store

I have a couple new sets of napkins in my store this week, an "Old MacDonald" theme set with farm animals and a "Here Fishy Fishy" theme set with fish and boats in a simple style. Stop by and take a look! As always, my sets are double-layer, with a novelty print and a solid color backing.

Farm print napkins

Wednesday, April 02, 2008

A few of my favorite things

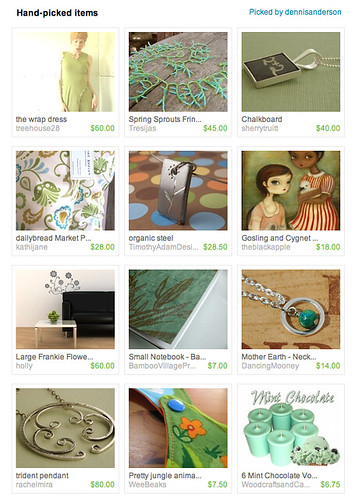
So you of course have been hearing about MY items for Etsy and are probably sick of that. Today I'm going to show you a few items I have marked favorites in my Etsy area, meaning they are things other people have made that I really like and am considering buying. Maybe you will like them too, and hopefully those shops will gain some exposure. Etsy is growing, which is good, but it is hard to get exposure with so many shops.

So, here they are, some of my favorites!

Tuesday, April 01, 2008

A bag!

So what did I do this morning? I made a bag! Noah slept really late today, and Zach has a bad cold so was mellower than usual. I posted mine on my shop at Etsy, but honestly it's easy to make your own if you sew:

1. Start with a pair of old jeans. Mine came from a yard sale for this project, provided by my mother-in-law.
2. Choose the part of the pants you want to use. I used the bottom of one leg. It was a large size pair, so that was big enough to make the size of bag I wanted. Make sure you choose a big enough part.
3. Lay out what part you want where. I chose to use the bottom cuff as the top of my bag, but I could have chosen that as the bottom of my bag, etc. I wanted to keep the frayed/distressed look of the bottom cuff and pocket, so those became the top. Generally, you don't want to complete the sewing yet.
4. Embelish! I carefully took off the back pocket and sewed it to the front as a pocket. I added some baby rickrack and a butterfly applique. This is easier with as many seams open as possible. In my example, the bottom of the bag was still open at this point.
5. Choose and add handles before or after step #5. My handles are from some material from the leg of the pants. Make sure you get these along the grainline if at all possible. Handles cut on the bias or crossgrain will have a tendency to stretch. I took strips and folded them then topstitched. I then sewed these to the bag.
6. I closed off the bottom of the bag at this point as my last step. Since I had a raw edge where I cut it from the rest of the pant leg, sewed it with a double stitch (because it was the bottom and holding weight) and then serged to keep the edges from fraying. Denim really frays badly. Another good open in a bag bottom without lining is a french seam, but this fabric was too thick to make that a good option for me.
7. Enjoy your new bag!

Here's mine:
Recycled denim bag

Thursday, March 27, 2008

My day is looking up!

So I spent the day fighting with, err creating, a new shorts/top set for my Etsy shop. I had to recreate part of it when my coverstitch machine chewed it up. Thank goodness I had more fabric. Unfortunately, of course, I had already done the applique on the front and was nearly done when the coverstitch took a good chunk of it. I did finish it though, and you can see that at my shop

BUT, my day started to look up quite a bit. I entered a drawing on a blog, Quilt Taffy for some fabric (because I NEED more fabric, right?) and I WON. Yippee!!!! You can see the my prize package here and I chose the brights, package #2. :)

So, not a bad day all in all.

Tuesday, March 25, 2008

Spam time, aka new items in my Etsy shop

Okay, so it has been a rough few days in my personal life and sewing is my relaxation, so I have new items in my shop as a consequence! Now, who can't use a nice toddler bib or two. Go on, go take a look. :)

Seriously, sales are slow but I'm still new to Etsy and it gives me such pleasure to create. I have discovered trading at Etsy too so while we may not have actual cash from it we will have plenty of other handmade items to use. LOL. There are tons of jewelry sellers (I traded for earrings), soap sellers (haven't found a good trading partner for that yet), knitted items (I traded for organic cotton yarn knitted face cloths), on and on. Yes, the barter system is alive and well on over at Etsy.

I'm off to do some gardening before it is too hot to do anything.

Thursday, March 20, 2008

Roooolllll call

Yes, we have a roll call - Lily performed a perfect rollover yesterday afternoon from belly to back, witnessed by me, Noah and Noah's speech therapist (Stephanie). Woohoo, way to go Lily!!! I'm sure there are many more instances to come.

Wednesday, March 19, 2008

Eewww - what is that?!

Painted Lady Butterflies
Yuck - That might be your first reaction to the photo today (along with the thought it is a terrible angle and quality of photo) but on further inspection you will see we were very happy to see these this morning. In fact, they are our Painted Lady Butterflies. They came in a kit of caterpillars and the photo you see is four out of five of them in chrysalis form. We have been watching them grow for the last little over a week and following their progress. More photos to follow next week hopefully. :)

A few links:
http://en.wikipedia.org/wiki/Painted_Lady
http://www.earthsbirthday.org/butterflies/bflys/activitykit/2.htmlhttp://animaldiversity.ummz.umich.edu/site/accounts/information/Vanessa_cardui.html

Monday, March 17, 2008

SewingMamas on Etsy blog

As you may notice, I sell on Etsy. Etsy has some groups called "street teams," that are basically groups of like-minded sellers, grouped by interests or geographically or other ways. I belong to the SewingMamas Street Team, which is a group of us who post and chat together on http://www.sewingmamas.com Well, we have a collective blog, where we talk about our shops and our work. Check us out at: http://etsysewingmamas.blogspot.com/ And I can say from swapping (trading with) and viewing the work of these ladies, that you would be a happy buyer from any of these shops. :)

Simplicity 3765


Simplicity 3765, originally uploaded by michaeldog_1999.

I got some weekend sewing in, and made Simplicity 3765 for Lillian. I made her the 3-6 month size and for once it pretty much ran true to sizing, just a little bit large. The aqua was a teeny scrap from the Wal-Mart scrap bin I paid less than 50 cents for. The red is a red stretch denim I have had in my stash for a long time, at least since Zach was tiny. I had planned it for the boys but it always seemed a little too girly, and now it is for our girl. :)

The things kids say ...

After the IKEA incident on Saturday we move on to Sunday, where Zach sees in his Cricket magazines a sweet idea of getting a bowl and a couple sheets of paper and writing on them compliments for mom. Then mom gets to choose one from the bowl and read it now and again. I any case he came to ask me for the paper but requested only one sheet instead of the suggested two sheets becuase, "I don't have enough compliments for two pieces. I just want one paper." DOH. Rich and I held our laughter until he was out of sight. LOL.

Why spelling is important.

So on Saturday, Rich, the kids and I went to IKEA for breakfast (99 cents!) followed by some shopping to pick up some new glass cups. We were in line for the breakfast when the signage caught our eye. It said "Swedish Craps 3 for $2.99." I kid you not. It was the type hand lettered on a chalk board. More remarkable was the fact that 3 separate IKEA employees handled the sign and looked at it in hanging it and none appeared to note anything amiss. Now all of us in line were noticing, and DH, geek that he is, tried to snap a picture of it with his camera phone, but alas it did not come out. One women in the line delicately hinted that are those Swedish crepes? - making a strong emphasis on the word crepes of course. The employee looked at her as if she were insane and couldn't she see they were?! My attention was distracted by the kids for a little bit (after all we are trying to get 3 kids through this line) and when I looked back someone had apparently come right out and told them it was spelled wrong and what the original sign said. They were in the process of getting the sign down, which they had put up not 2 minutes earlier, and getting it quickly to the back. So I wonder, does their sign person truly have bad spelling skills or was this deliberate (ie perhaps he quit later that day and this was his last laugh)? In any case, Rich and I got a chuckle with our breakfast.

Friday, March 14, 2008

Noah's new patchy pants


Noah's new patchy pants, originally uploaded by michaeldog_1999.

Today I finally got my serger back from the shop and finished up Noah's "patchy pants" that I started quite a while ago. The patches down the sides are from all different pairs of jeans and denim jumpers family members gifted to us when they were worn out from regular use. I love all the different shades of denim there. The rest of the pants are baby corduroy (new not recycled use this time!). He is happy with his new pants. He is still in the beginning stages of potty training so I want to keep him in elastic pants, and elastic pants can get pretty boring but these do a lot to make them more interesting. These are fun to make too because you can use up scraps of this and that.

Tuesday, March 11, 2008

Illegal to homeschool in California? Nope.

For those of you who are hearing it is illegal now to homeschool in California, that is not the case. Several news agencies are portraying it that way (and several are not of course) in order to grab attention, but dig a little deeper and you will find out probably more than you ever really wanted to know about CA homeschool law. Unless it effects you directly of course, as it does us, in which case you need to know every little detail.

For those of you interested in updates, a good place to look is the California Homeschool Network website. They are keeping their legal updates current regarding the issue. http://californiahomeschool.net/howTo/updates.htm

Thursday, March 06, 2008

Modified Otto pants, purchased top

Today's sewing started out bad in that the T-shirt I was making for Zach out of the very last of the outerspace ribknit he loves became a wadder, now residing in the trashcan. It was on its way to being perfect (meaning I pretested the pattern on another shirt and the fit was perfect). I then broke out the very very last of his current favorite fabric, an outer space knit with rockets and so forth. I trimmed it with a red collar and sleeve bands, a favorite hue of his. I don't know what happened, if the needle became dull or what, but somehow on the bottom hem the fabric got shoved down through the footplate by the needle and got ripped in the process. Arrggghhh! A wadder.

In better news one of my favorite Yahoo group fabric co-ops (Fabricand Notions run by Ressy) posted a BUNCH of cute knits today, including several bigger boy prints. I ordered some of those, and hopefully one of those will be the next favorite fabric and we'll do that shirt again.

I then moved on to Lilly's pants in the photo that I cut earlier in the week. They are Ottobre 3/07 #3 in a size 68 cm. I left off the front and back pockets because what 6-month-old do you know uses pockets?! I also didn't line them and left off the bottom frill. I wanted them very very light for summer. They came out okay but the crotch depth is a little short for her cloth diapers so they ride below her belly button. They look comfy for her though. I matched it up with a RTW onesie someone gave us and put an applique with rickrick on the onesie to match the bottoms. I like her in the bubblegum pink rather than the pastel type pinks. Her skin tone doesn't look as good in the pastels.

I had to finish the seams with my regular machine though on this as my serger is in the shop. Boy do I miss it. What did I ever do before I had a serger? ...