My disclaimer is there are many, many other ways to do this. I've tried a few of them, and my personal opinion is this is the easiest I have found so far. So, I'm going to share how I do it with photos. If you have tips, comment and share! :)
First off, you need to have something to put a design on. Duh, right? So get a shirt, or do I like do and sew one. Or pants, pillowcase, whatever you want to put a design on. Make sure though it has been washed to remove the sizing from the fabric, and do not use fabric softener. You want the paint to stick to it well. Different fiber contents will have different results but most knits I have tried have had decent success.
You need some paint. You want stuff that can be used on fabric, and not wash out. Look for ones that specifically say fabric, and ideally not "puffy" types of paints ala the 1980s for this type of use. Try your local craft store. I am in this example using an acrylic, which works rather well. I found my particular brand and color for this project in the clearance bins at JoAnns for 75 cents.
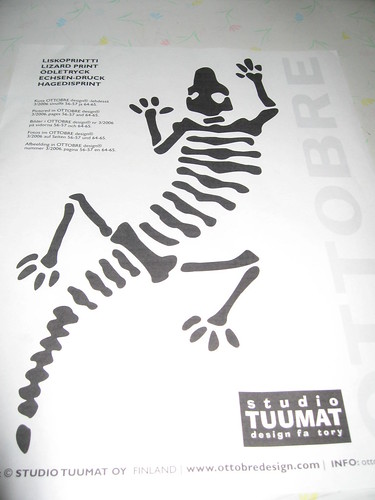
Next you need a design. My design today comes from Ottobre Design which is a European pattern magazine. They have print for free designs on their site as well for personal use. If you want this exact one, go to the site, choose English and then "print for free" on the right side. You can scroll through, find it and print it. While you are there, check out their magazine, which has truly incredible sewing patterns, and often has a few stencil designs in every issue as well. I can't rave enough about their patterns though for kids. Okay, back to the topic, you have some design.
You need to trace this onto the material you are going to use as a stencil. I like freezer paper. This paper has a waxy type coating on one side and paper on the other. Other people use plastic sheeting or a variety of other things. My instructions from this point forward, and my photos, show the use of freezer paper.
I neglected to get a photo of the tracing step, but lay the paper, waxy side down, on top of your design. Trace it onto the paper side.
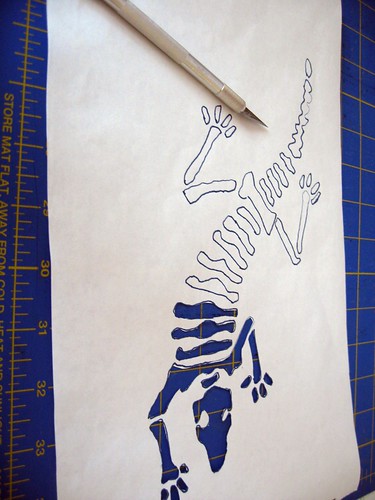
Now you need to cut out the areas of the design that are going to get paint. Think carefully on this and visualize it in your mind. You want to remove the paper from the areas that are going to be filled in with paint on the shirt. You might even want to color those in on the design to picture it better, and then cut out the colored parts to be sure you have it right. Use a very sharp Exacto type of knife. I got mine from the scrapbooking supplies area. They have some with swivel blades and all different types. You want it very sharp and small to do detailed cutting. Use only on a rubber mat or protective surface so you don't damage the surface underneath. Cut out carefully the areas to be painted. Here is mine partially cut out:
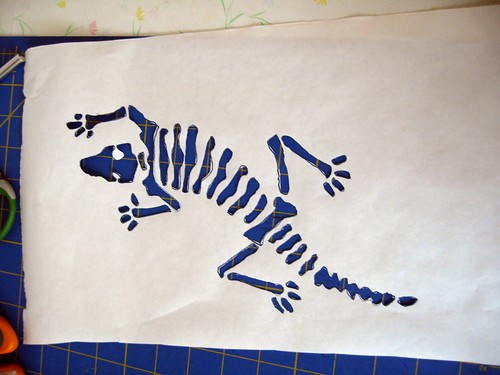
Then completely cut out. Note I didn't remove the excess paper around the design. This is important. Only cut out the parts that get paint.
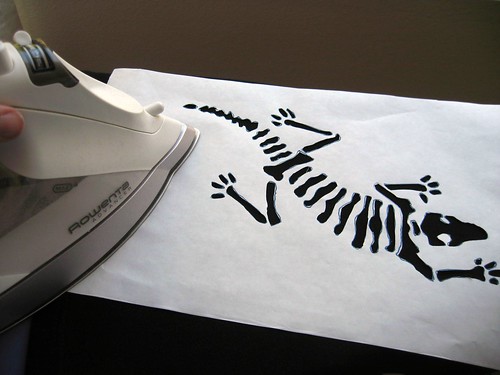
Position your stencil template on your fabric exactly where you want it, with the waxy side towards the fabric. This is very important -- make sure the waxy side is against the fabric! Take it to your ironing board. With an iron set to a warm setting, carefully iron over the freezer paper. This will soften the wax part and make it stick to your shirt. You want to be sure the paper is completely stuck to the shirt in all areas.
Take the shirt with stencil affixed to it to where you are painting. Put a protective layer inside the shirt so if paint bleeds through the front layer it doesn't stain the rest of the shirt. I used an old brown paper bag. Get your paint and start dabbing it on with a paintbrush or sponge into the areas cut out in the template.
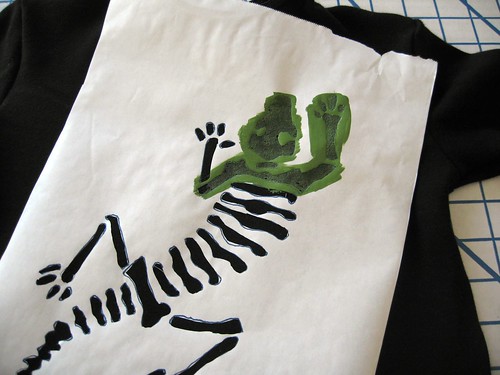
Cover the whole area. It is likely you may need several coats as the paint soaks in a bit. The coats needed will depend on the fabric type, thickness and colors. I wait a few minutes and then recoat as it soaks in.
Here is my design all painted with several coats. Wait for it to dry a while like this.

You don't have to wait for it to completely dry, and I find it is better to remove the freezer paper when it is still a little damp. It works kind of like removing that blue tape when you are painting rooms. If you wait too long the edges of the tape stick to the painted surface too much. Carefully pull the template loose. Remember you stuck it there with the iron/wax, so it will be a bit stuck. Just carefully lift it loose, being careful not to smear the design. Then admire your new design!
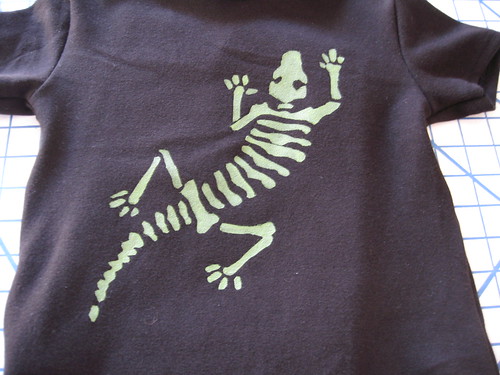
Let the shirt dry completely (usually 24 hours or so) before wearing. Check your fabric paint bottle for specific instructions on your brand of paint. Have fun experimenting!
1 comment:
great idea for fun kids clothes!
xoxo
jul
Post a Comment